Wednesday, August 27, 2014

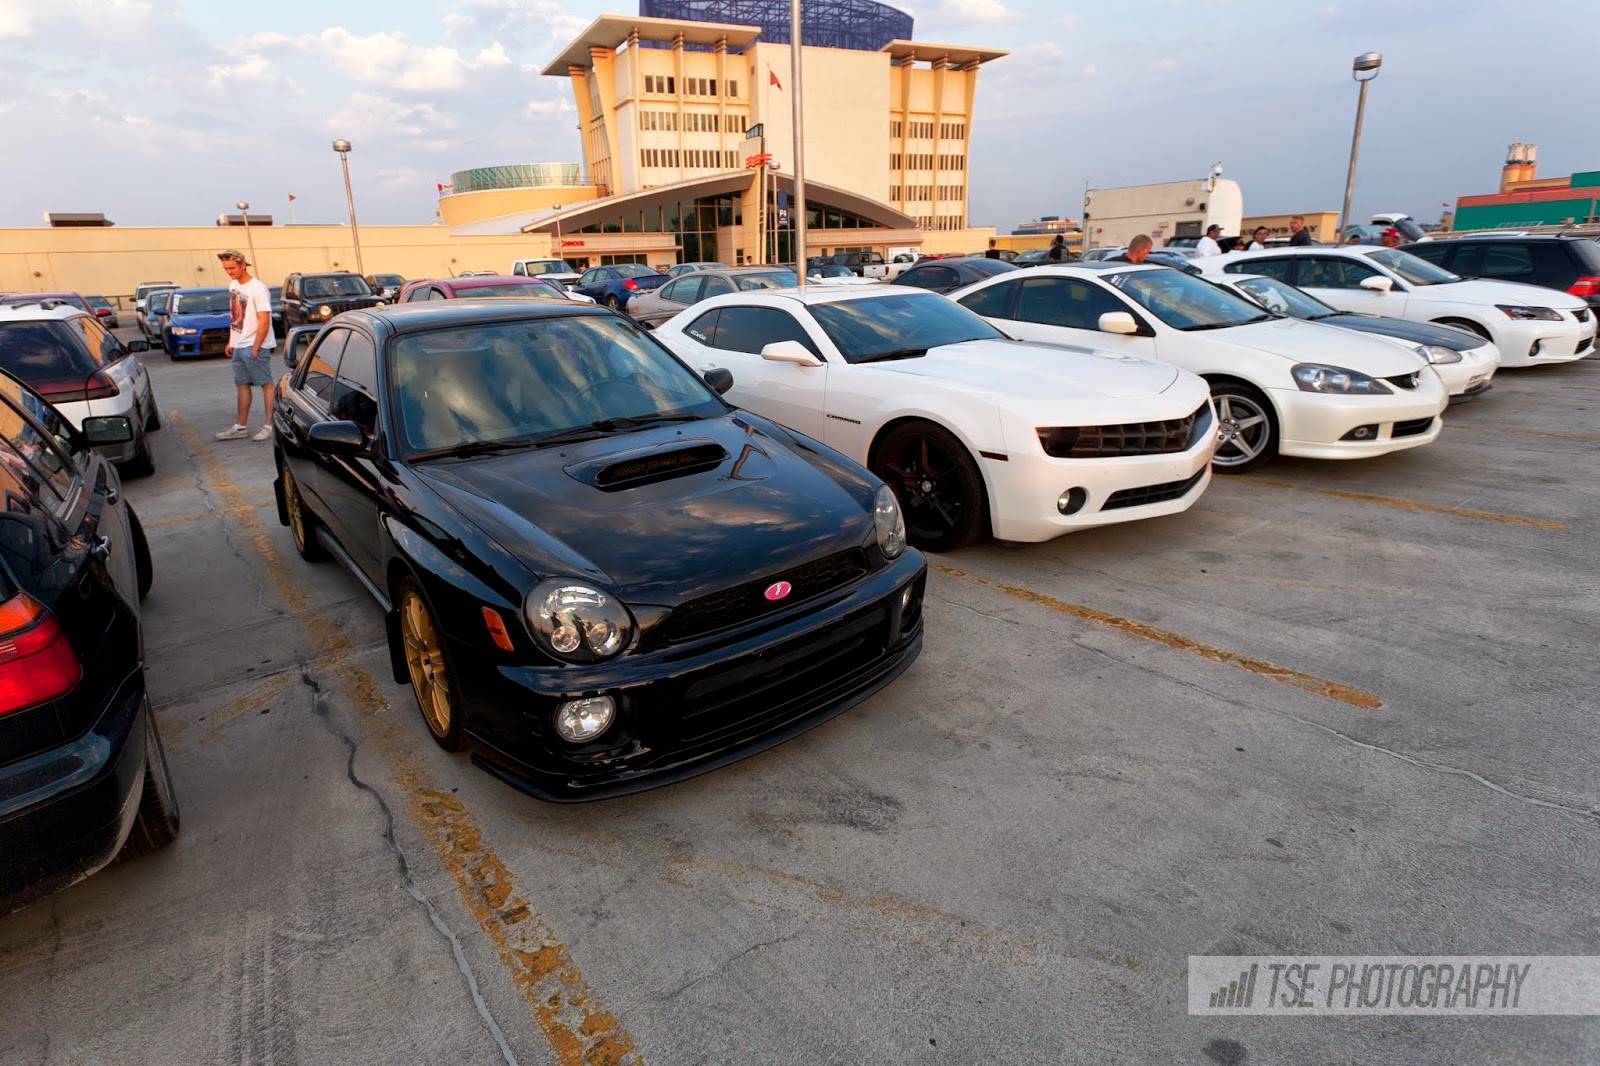
illmotion Show & Shine 2014

So as you all know, this year is the fourth annual iM Show & Shine. Every year, I do a little bit of mingling and snap some pics here and there, but I never had the intention of posting them up until now. So.. let's get started. (Apologizes in advance if I missed your car!)

P.S. Feel free to use any of the shots.. just remember to give credit! #TsePhotography

Yaris + Blitz Supercharger = This.
The Vancouver Trio! I saw the new livery for this Subie on Instagram, looks good!
Makes me want a Honda Beat even more now.
SR swapped 86
I've seen this car go all the way from stock to what it is now. Even though it's had both ups and downs over the years, there's no denying that this car is outright amazing.
Brad's K swapped EM.. now supercharged!
This one is definitely an eye catcher. (To me anyways haha)
Very clean!
K swapped 7th gen. Now I'm tempted..
It's been a year since I last saw this car in person.. looks completely different.

Needless to say..  it looks amazing.
Haters gon' hate

Aggressive widebody ...
... Just can't get enough of it!
This one definitely caught my attention.
iTR. Mmmmmmm
Still a favorite of mine...

Also saw this one exactly a year ago. Looks so good! Love the setup you've got Zach.
I first saw this a couple months ago at Grey Eagle. Crazy how much HP this thing has.
TE37 in the front + RPF1 in the rear
Probably one of my few favorites from the show. Stunning.

The other favorite of mine.
Sorry I took so long to edit the pictures! Anyways, hope you guys enjoyed the pics and thanks for sticking around to read all of this.

Again, if you guys see me at an event.. come say hi! Otherwise I'll catch all of you on the next post.

Monday, August 11, 2014

Beyond Meet / August 6th 2014

It's been a long time since I've really posted anything.. but I thought I'd try to start it back up again with the odd post here and there. Instead of spamming Instagram, I figured I'd post them here.

This week's Beyond meet was pretty interesting.. Why? No cops. No burnouts. No drifts. No Rav4 almost colliding into a parked Evo. Crazy. I know.

One of these things is not like the other
Had to do a double take at first. You know, they don't actually look bad at all though. (Brandon! Lend me the other two iTR rims!)

Well I know what I'm gonna wish for this Christmas..
Saw these two sitting in the corner. That's right. It's a Honda Beat. I don't know about anyone else, but I've always wanted one of these. I saw someone get a ride along in this.. I was pretty jealous.


Looks just as clean as the last time I saw it! Something about that red that makes it pop.


A different take on the NSX. Looks great, especially with the flawless paint.

Family Portrait
If you've been creeping my Instagram the last few months, then you know whose GTR that is!


If you're sick of seeing black cars.. well here's more! All jokes aside though, the JDM headlights look much better than the stock USDM ones IMO. Nice to see it out on the streets again.


I've always had a thing for S2000s and this is no exception. Bronze TE37s really top it off. Nice and clean! Props to the owner.


Lately.. I've been seeing a lot more Evo 4 and Evo 5's on the streets. These things are seriously fast, no joke.


The VIP trio. Didn't see many other VIP cars that day, or maybe I'm just blind. (Yeah, probably the latter..)


Found this one parked in the back. Like they say, K.I.S.S (keep it simple, stupid) and this one does it perfectly.


Heard the roar of an LS and saw this as it turned heads pulling up to the meet. It's odd to hear the sound of American muscle coming from an FD, but it sounds good!


Maybe I'm just obsessed with Hondas, but you can't really blame me. I mean, look at this!

Go follow! @pdotpatel
Not many people were lurking around this car (or at least from what I saw), but it was probably my favorite of the night. A lot of work has been put into this Integra, so if you're curious about what's under the hood go check out Punit's feature on illmotion.

If you managed to read all the way through.. kudos to you! Hahaha. I promise the next one will have less talk and more pictures. I'll also try to take pictures of more than just Hondas, I swear.

If you see any pictures that you like, feel free to grab them off of here.

Anyways, I hope to see more of you guys the next time I come out. If you've already figured out who I am, feel free to come over and say hi!

Wednesday, February 20, 2013

Tunnel Vision

So if you're wondering how the pros do rig shots.. well here it is. I've seen the end result of shots done with Virtual Rig and those don't compare to this. This shows the real potential of rig shots and what it takes to actually make it flawless. Of course some are gonna say its over rated... or fake and gay... let's be honest though, this is a true rig shot in all of its glory. No crazy ass photoshop here and definitely no Virtual rig.


What would scare me the most is having that plate of glass break on me. Trust me, I've had my fair share of freak accidents while doing rig shots... especially windshields (sorry Damian!). Anyways, enjoy!
Wednesday, February 6, 2013

Silver & Light

After watching this video, my view on photography has definitely changed. What makes this video so great is not only the fact that he makes such large prints with the world's biggest mobile camera.. it's the fact that he does it all by hand, each one unique in it's own right.

Click here!
Being able to hold something that big and knowing YOU made it with your own two hands really does add up. The fact that you get to see him both succeed and fail goes to show that this kind of work isn't easy. In mere seconds, a wet plate can turn into useless scrap metal. I can't imagine the kind of thrill you get when making wet plates, but the results definitely pay off.

When Ian mentioned how digital suddenly swooped into the scene and suddenly everyone had digital, it made me think about the gear i've got now. Made me think about how dumb the constant bickering between Canon and Nikon fanboys sound. I always dread answering the question, "what gear do you use?", does it really matter? Haha.. better equipment won't make you any better than you already are unless you shoot more. Nowadays though, i'm leaning towards the idea that.. as long as it works, shoots, and produces images at a big enough size, i'm happy. None of this, "Canon shoots better" or.. "Nikon has better glass" or "Nikon magic" shit. A camera's a camera, and at the end of the day people no one really cares what you use, as long as it looks good.

I'd personally love to do this myself, but if i recall correctly.. in an interview with Chase Jarvis, he quoted the price of each print costing roughly $500. This goes to show how much Ian Ruhter is dedicated to this kind of photography. Like he said, why enlarge when you can shoot big to begin with?


Sunday, January 27, 2013

Sample Edit 01/27/2013

NISSAN SKYLINE GT-R R32

Like i promised, here's the edit of the example rig shot i did of my friend's R32. So let's jump right into it.

Now that you know how to do rig shots (assuming you read my last post), you're gonna need to know what to look out for when it comes to post-processing. This is roughly how i go about editing rig shots. Maybe you'll learn a few things, maybe you won't, but let's get started..

I guess if you're completely new to the idea of a rig shot, then this should be new to you as well. No worries though, we'll work the kinks and details out using photoshop.


Original, straight out the camera


Let's get started...
So for this shot, i planned out step by step what i wanted to do first and what i wanted to do last. For me i chose to get rid of the camera/boom reflections first before getting to the actual rig itself.


Better get good at cloning
Starting from the bottom up, i dealt with the reflections first as they were the easiest to fix. Most of this was done using the clone stamp tool, and a bit of the smudge tool on certain parts to smooth it out. Be careful when using the smudge tool, remember to take your time. 

Sourcing for the clone stamp basically came off neighboring pixels, so cloning and blending wasn't difficult. Just be careful and make sure your blending is spot on before going to the next step.


Fudge'd it? It's ok, just smudge it.
After doing the bumper and the head light, the next section to cover is the fender. Essentially the same tools were used here, the clone tool and then the smudge tool. I started out by outlining the portion of the fender that i wanted to select using the pen tool. After i've got a smooth curve covering where i want to clone, i filled the area in and tried to mimic the reflections from the rest of the fender. Once i was finished with the clone tool, i switched over to the smudge tool and smeared the cloned layer bit by bit until i got a smooth finish. 

Doesn't sound like much fun, but it works when it's done right. Honestly, this took a couple tries to get it right, so don't expect to get it bang on the first time around.


Time to fabricate a new hood
So.. next step is the hood. Aside from fixing the clouds, fixing the hood is the second most important part of the shot. Like the previous portion with the fender.. we do the same thing. The only difference is the scale that we're working at. 

Again, start by using the pen tool to get a smooth outline of the hood. Remember to select the entire hood, all the way from the grill to the windshield. If you can't make out the exact shape, then over approximate by a bit and erase the extra bits later. There are two ways to approach this.. by using the clone tool then smudging OR duplicating the hood entirely and smudging it from the grill all the way to the windshield. Either way works well, so long as the part looks smooth and correlates well with the rest of the hood. Make sure the reflections match, otherwise it's going to look fairly awkward. Again, this might take a while to perfect, so if you're anything like me.. getting it just right will take time.


Rig removal
The next big step is to take out the rig from the background. This means making new clouds from the pre-existing ones and so fourth. In one go i went and took out the rig by cloning surrounding portions big enough to cover it up. This part probably took me the longest; it took roughly 10 tries to get it right.. but eventually i got around to it. To make the sky match more appropriately, i used clouds from other portions of the picture. These parts were then transformed and fitted over top of the rig section. For steps 3 through 6 i repeated this until it the entire rig section was covered.


Free windshield replacement
Now that the hard part is over and done with, finishing touches need to be made. Although it seems miniscule.. i decided to redo the windshield as open window stuck out like a sore thumb. Same thing as always, select, clone, then smudge until the reflection matches.


Picky is good
Getting down to the nitty gritty details of the car now. Remember to clone out things like dust on the camera lens, rock chips, odd reflections, etc. When ready, finalize the picture and edit it like usual. For this shot, all i did was straighten out the frame, bumped brightness/contrast, saturation by a bit, and exposure as well.


Finished
... and this is what i ended up with! For what it's worth, rig shots definitely do make or break a set. So whenever you can, do rig shots! Remember that practice makes perfect. Editing these kinds of shots takes lots of practice and some improvisation. Work with what you've got and make it happen!

If you're too lazy though, pirate VirtualRig studio and call it a day.


Monday, January 14, 2013

Photoshoot Impossible

It took me forever to find this on youtube. This is by far my favorite automotive video on the internet. Why? Just watch and see for yourself.


The comments pretty much sum up the video... but I'll let you guys judge for yourselves, enjoy!

(I don't know if you could sense the sarcasm here, but it's okay. Calm your horses. Haters)